Well it's January and a new year and this post has been sitting around half written in a tab for...three months now. Because that's about how much time I have to commit to my personal, creative endeavors. Now you're going to be sitting here saying. WHAT THE HELL? It's January! Pumpkin was SO last season, but regardless my friends. In this girl's ersatz world, pumpkin is never out of season. Especially when I still have cans left over from Autumn.
So this is still delicious. And I'm still posting it. So you're going to have to deal until I can write up something anew.
Imagine a golden autumn afternoon, a day off, a loving girlfriend tending house and putting together a pumpkin bread pudding with the left over challah bread she baked a few days ago. Hoping to have a blog post made, and a warm homey dessert ready and waiting for when the philosopher returns home. Sounds lovely right?
Segway to the stupidest wine topper/wedding favor ever created shattering, slicing upwards into flesh. A maelstrom of glitter, blood, and glass splattered all over the kitchen.
In other words. Utter glittery mayhem.
After numerous attempts to tourniquet the non stop bleeding with a torn up wash cloth, I finally decide to go knock on a neighbor or two's door. Finding a nice lady who is thankfully a mom living next door, with a first aid kit, filled with REAL medical supplies. She patches me up, tells me I need stitches stat. Sends me on my way. I...shoo the kitten away from the wreckage where he is trying to consume my blood off the floor, strain my custard through a flour sifter. Clean up the carnage and stick the custard in the fridge until I can find someone to open up the can of pumpkin for me. Manage to make myself look human and move my car for alternate side parking. And then await to return of said beloved philosopher so we can attempt to find an emergency room.
Seven hours we waited, while my poor pudding sat unfinished until the worst doctor in existence finally saw me. And gave me three terrible stitches, that I probably could have done better with a sewing needle and some fishing line.
Officially, the worst day off ever.

When we finally arrived home, I utilized my room mate as a puppet and finished the recipe. For your puddingy pleasure....At least now you have something to do with those leftover cans of pumpkin right? Right.
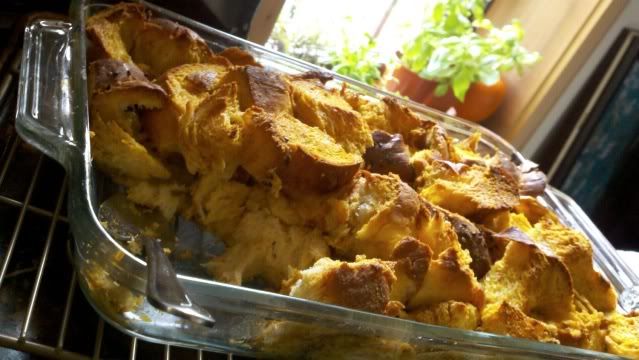
Pumpkin Bread Pudding.
Ingredients:
About 15 ounces of canned pureed pumpkin.
6 eggs.
2 tablespoons of dark rum.
A half to 3/4 cup of half and half or heavy cream.
1 tablespoon of vanilla puree.
3 tablespoons of pumpkin pie spice.
1/4 a cup of granulate sugar. Plus 2 tablespoons brown sugar.
1 tablespoon of cinnamon.
Half a stick of butter, melted.
1 challah loaf, or whatever other old bread you might have sitting around.
Hardware:
A bowl.
A whisk.
A large casserole.
And Away We Go.
Consider this the quickest possible route to a bread pudding, which in my opinion is never an exact science so feel free to eff around with this to your hearts content. This is just what I did that fateful day.
Take your bread, and tear it into nice bite size-ish chunks, and toss that in the melted butter, then tumble them into your casserole and whip out your bowl. Toss all of the other ingredients together, sans pumpkin and whisk until combine, then add your pumpkin and whisk until homogenized. Your mixture should be thick but still runny enough to soak into your bread.
Pour it over the top, and let it rest for an hour at least and preferably overnight. When you're ready, push that baby into a preheated 350 degree oven and let it bake for about an hour. You'll know it's set when you can push in on a crack and no liquid custard seeps out.